Dreambooth GUI Installation - Train AI on Windows
A step-by-step trail how we installed GUI version of Dreambooth to train Stable Diffusion with different images.
About FollowFox
followfox.ai is an AI exploratory initiative of the boutique marketing agency FollowFox.org.
Until AI takes over, FollowFox.org offers a full range of marketing services at boutique quality by top talent in the region. Support us by:
Overview
There are many ways to fine-tune stable diffusion to your specific styles or images. This time we run it locally on a Windows machine using smy20011 / dreambooth-gui (link).
In our previous posts, we wrote how to do the same using third-party services like astria.ai (post link) or how to run it on a rented cloud GPU (post link).
Installation
Installing Docker
The first step is to install one of the two prerequisites, called Docker.
Go to docker.com and click “Download Docker Desktop”.
Once downloaded, run it, click ok, and wait.
Once finished, click close, and the first step is done.
Installing WSL (Windows Subsystem for Linux)
The second prerequisite is WSL2.
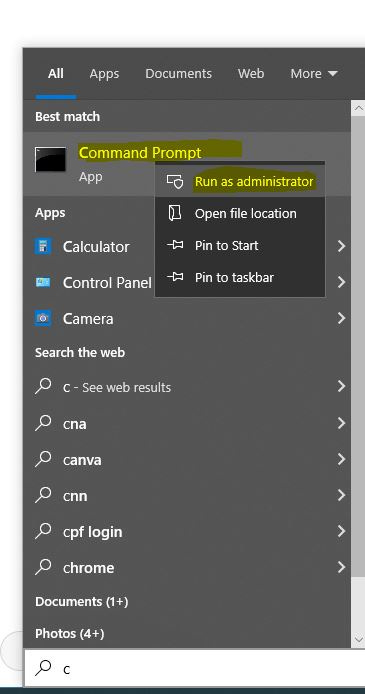
Run CMD as admin by clicking the Windows icon, typing CMD, right-clicking on the icon, and selecting “Run as Administrator. A black window will pop up.
In the window, type “wsl --install”, hit enter, and wait.
Launching Docker
Launch the Docker we just installed and click accept.
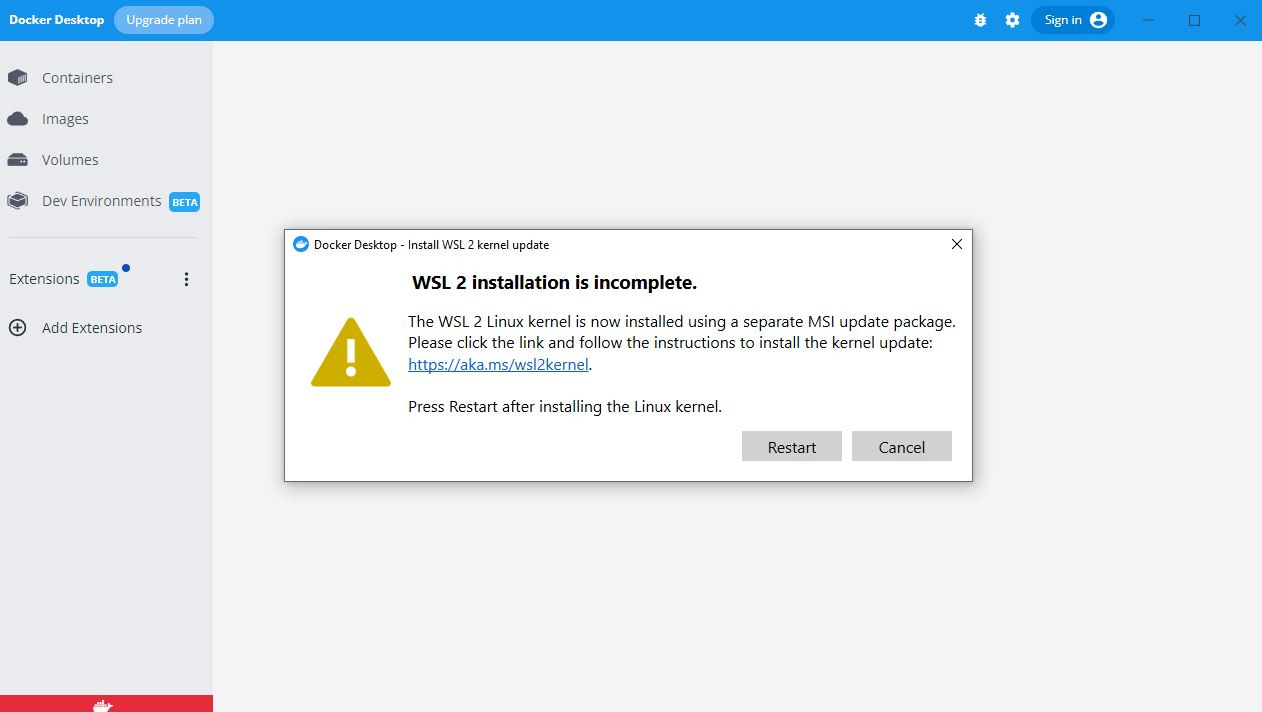
At this point, it’s common to encounter an error. Here is a fix if you see it:
Visit the link in the error message (link)
Press the link under “Download the latest package:” (link to download directly)
Launch the downloaded file, click next, and finish.
Now you need to restart the Docker. If all goes well, you’ll see:
If Docker is still giving errors, restart the computer, which usually solves it.
Install Dreambooth GUI
Visit GUI Github, and download the x64 installer.
If Windows gives you a warning, click Run anyway.
Click next, select installation path, click install and wait.
Running GUI and Training
Note: this is just a quick overview with no details about image formats, settings, etc. The goal is to get this GUI running and training for now.
Once you run the installed GUI, it will have a simple UI with a few tabs.
From the first tab, “Pick Image” select a folder where you have a few training images. (tubes are not there by default, I selected them)
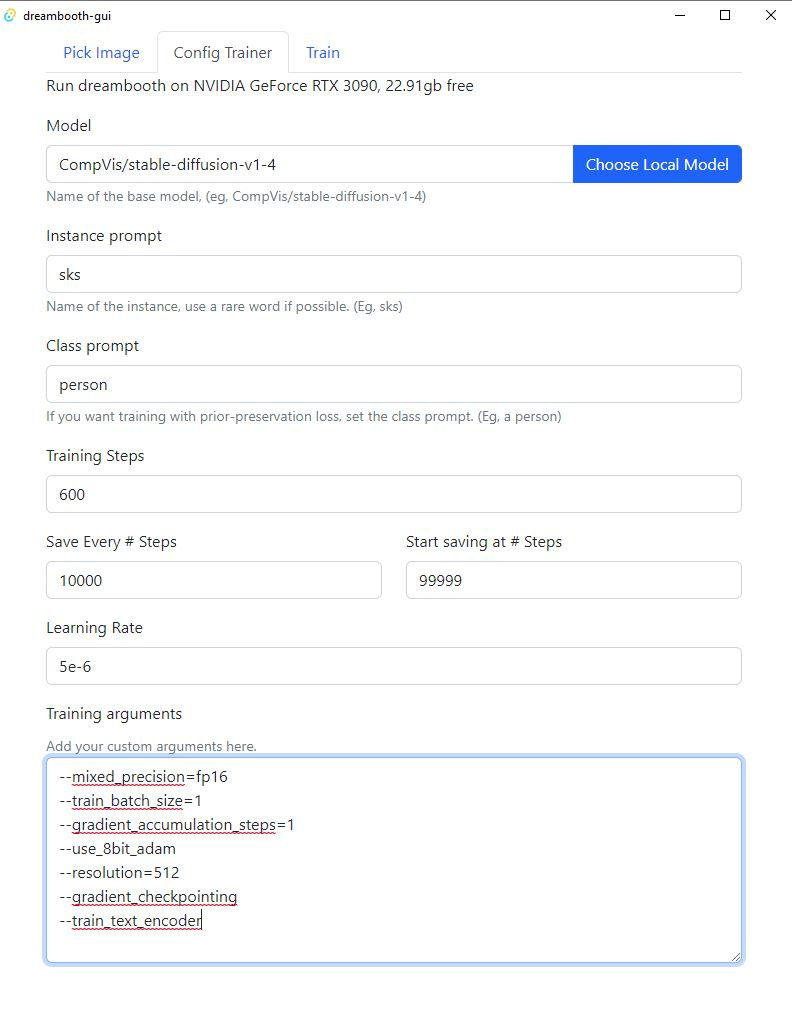
In the next tab, “Config Trainer” make sure to enter your Class Prompt (something generic like “person”) and edit training steps and learning rates.
Under training arguments, make sure to at least have these lines (or more if you know about Dreambooth training details)
--mixed_precision=fp16--train_batch_size=1--gradient_accumulation_steps=1--use_8bit_adam--resolution=512--gradient_checkpointing--train_text_encoderOn the last tab (Train), set the output destination folder; just keep in mind these files get large.
If you don’t have a huggingface token:
Go to https://huggingface.co/ and create an account.
Log in there, click your profile icon on the top right corner, and click settings.
Under the settings, click “Access Tokens”, click “New Token,” and copy generated token to the clipboard.
Now paste it to GUI under “Hugging Face Token”.
Done - press Start. The first run will take longer as it installs all the required packages.
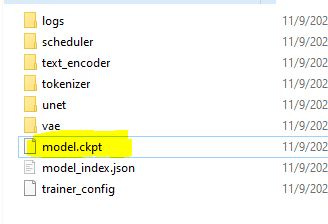
It will take some time and generate a cpkt file in the folder that you selected for results.
You can copy and paste the cpkt file to your Stable Diffusion models. If you want to run it with WebUI, check out our previous post. Link


